The Brompton’s Sturmy Archer internal hub was loved by the community. This is partly due to the low maintenance nature with them. Should you require to run a service on the hub, here is how I did it on one of the hub.
![](http://www.petrelli.cc/wp-content/uploads/2018/06/cracking_the_rear_hub_open_001-1024x683.jpg)
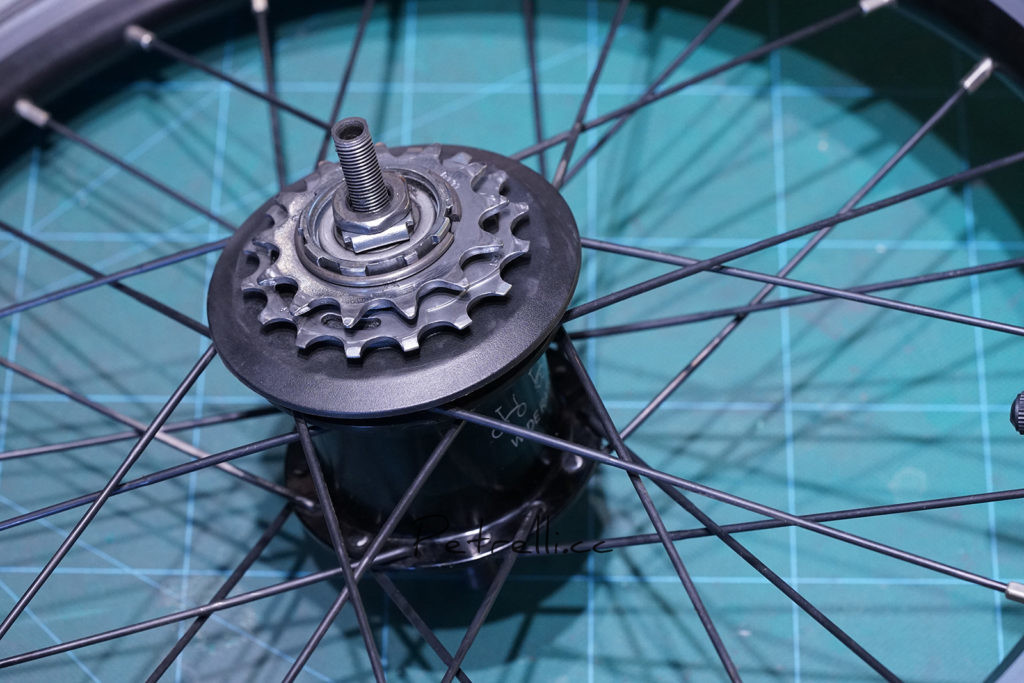
Preparing to service the Brompton internal hub.
![](http://www.petrelli.cc/wp-content/uploads/2018/06/cracking_the_rear_hub_open_002-1024x683.jpg)
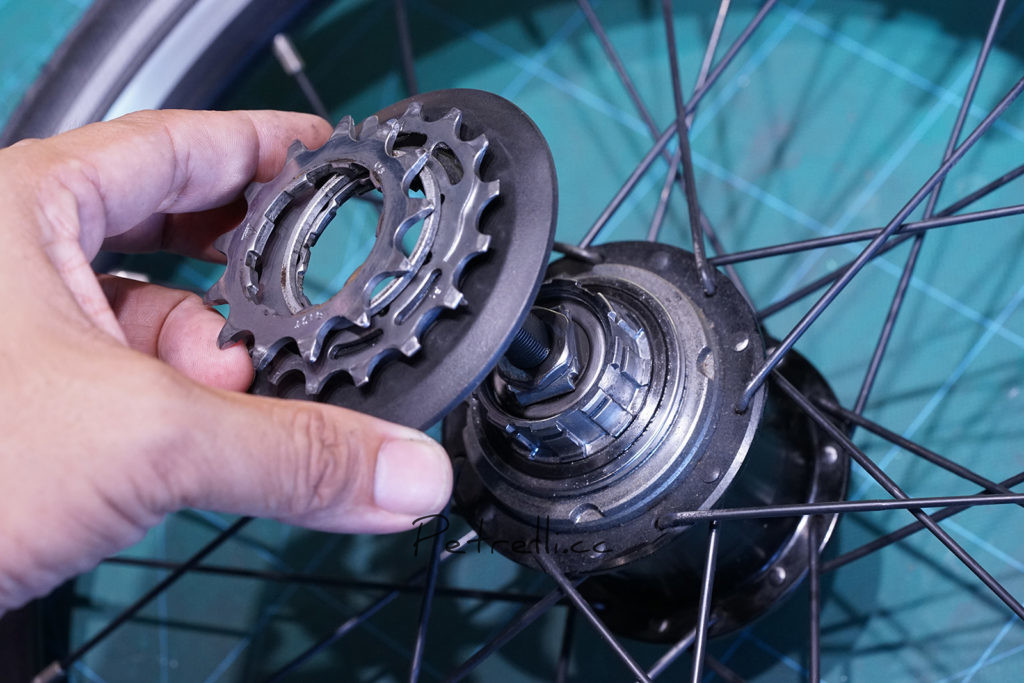
We first remove the cogs set from the hub.
![](http://www.petrelli.cc/wp-content/uploads/2018/06/cracking_the_rear_hub_open_003-1024x683.jpg)
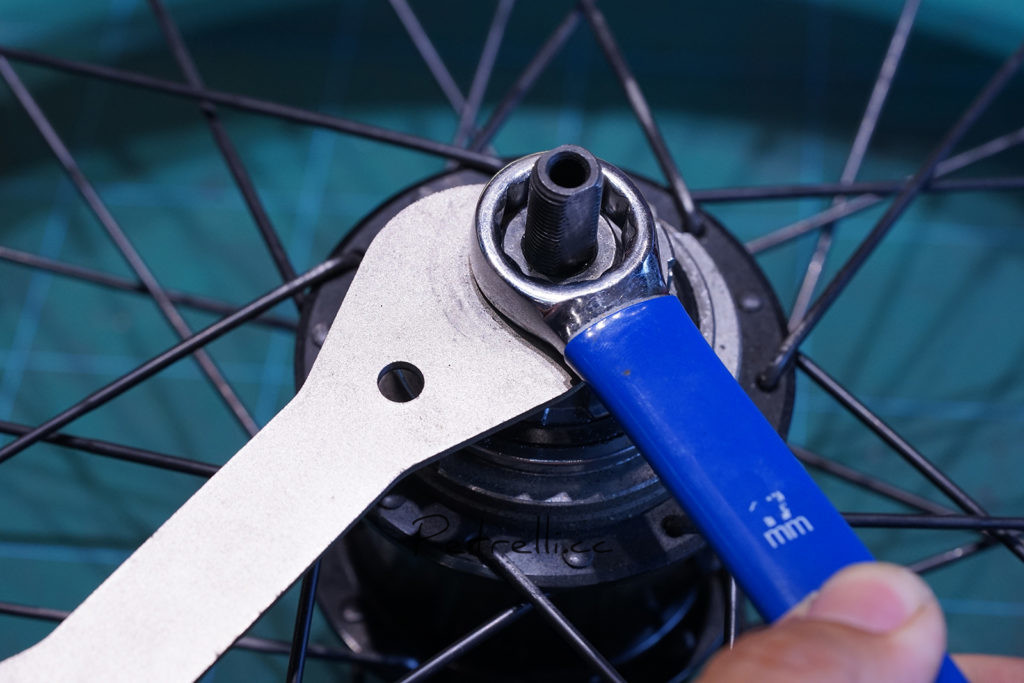
Loosen the necessary nuts with a 16mm and 17mm spanner wrench on the non-drive side of the wheel.
![](http://www.petrelli.cc/wp-content/uploads/2018/06/cracking_the_rear_hub_open_005-1024x683.jpg)
The non drive side’s nuts, washer and bearing place holder are also loosen.
![](http://www.petrelli.cc/wp-content/uploads/2018/06/cracking_the_rear_hub_open_006-1024x683.jpg)
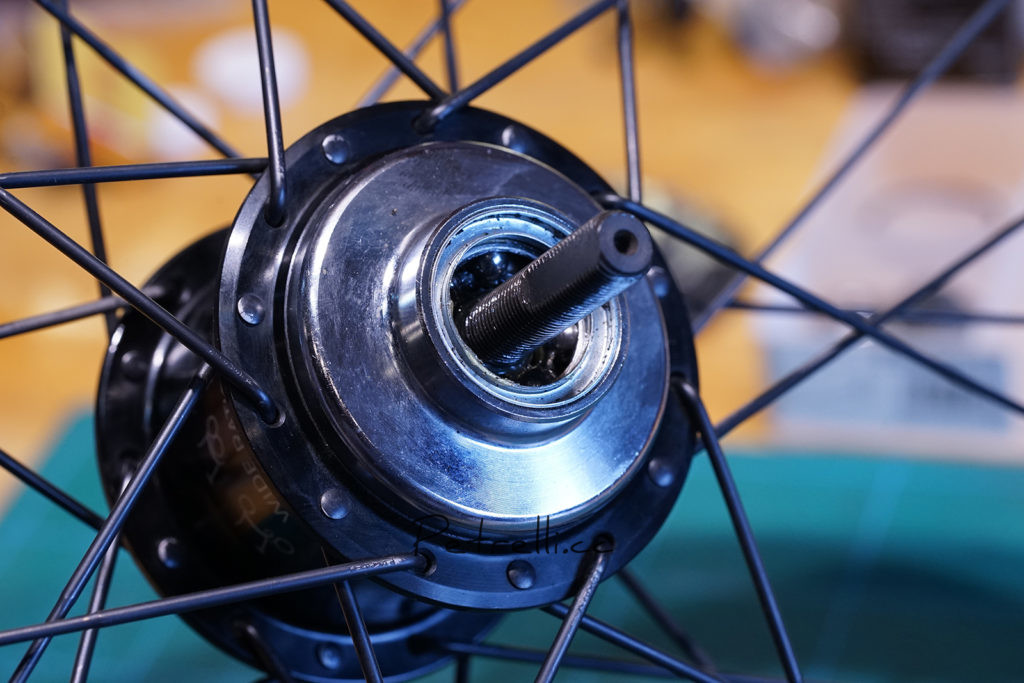
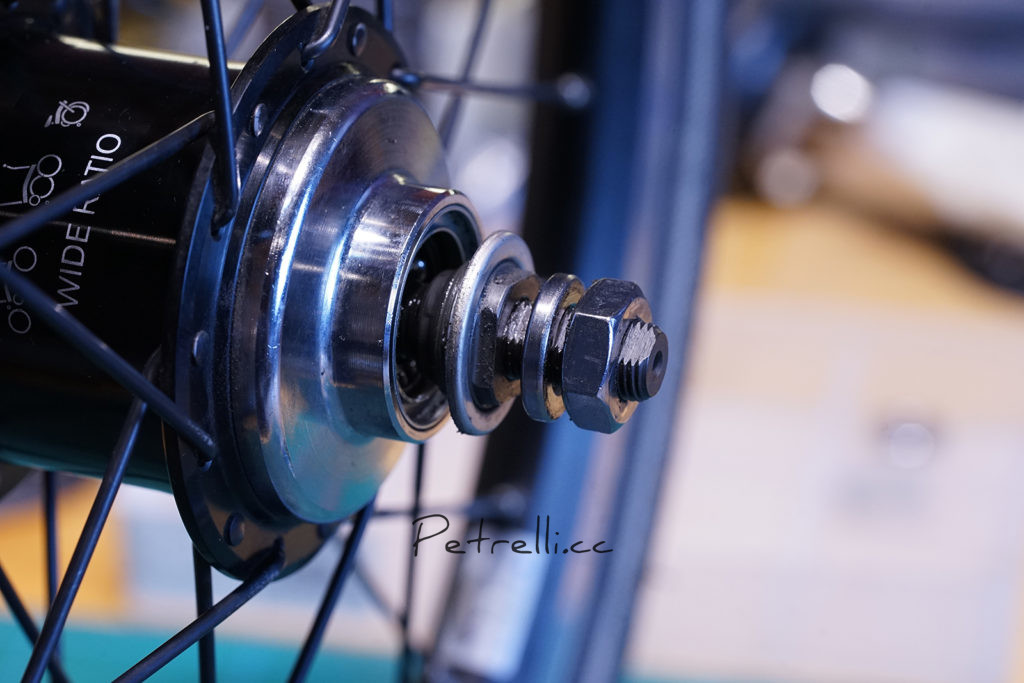
Completely remove the locking nuts and bearing place holder on the non-drive side of the wheel.
![](http://www.petrelli.cc/wp-content/uploads/2018/06/cracking_the_rear_hub_open_007-1024x683.jpg)
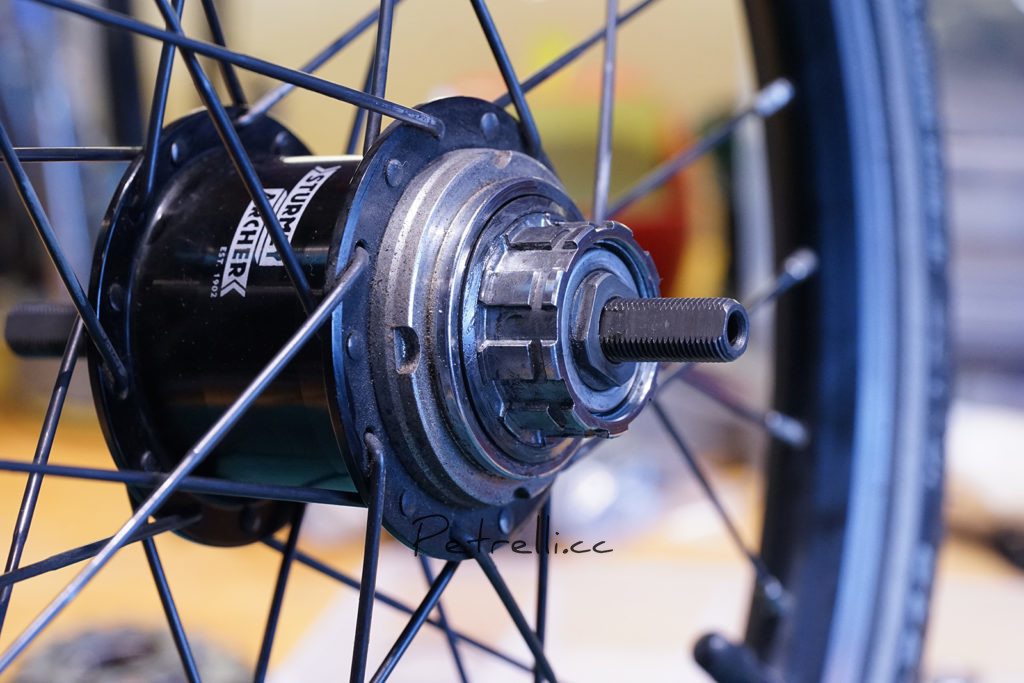
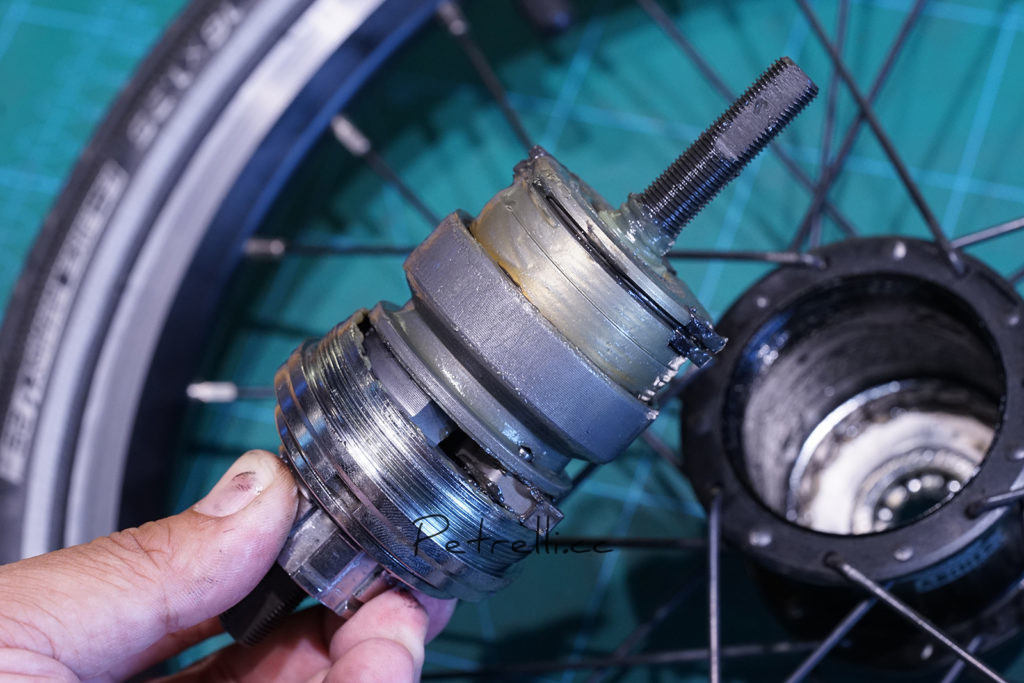
Prepare to remove the “gear box” from the rear hub.
![](http://www.petrelli.cc/wp-content/uploads/2018/06/cracking_the_rear_hub_open_008-1024x683.jpg)
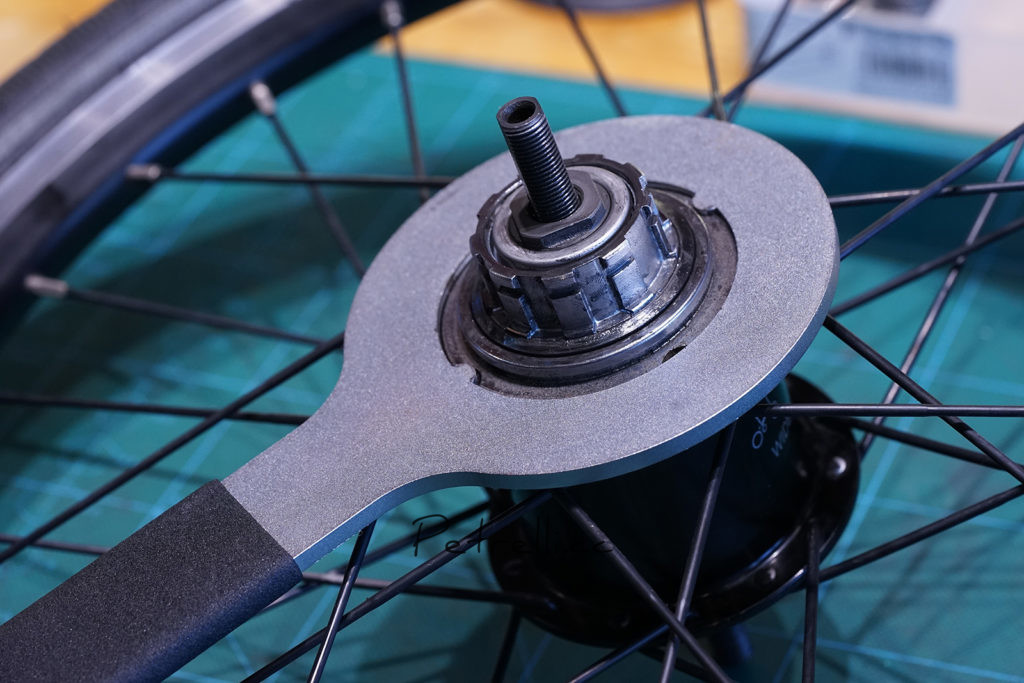
Unlocking the rear hub’s “gear box” with the supplied tool.
![](http://www.petrelli.cc/wp-content/uploads/2018/06/cracking_the_rear_hub_open_009-1024x683.jpg)
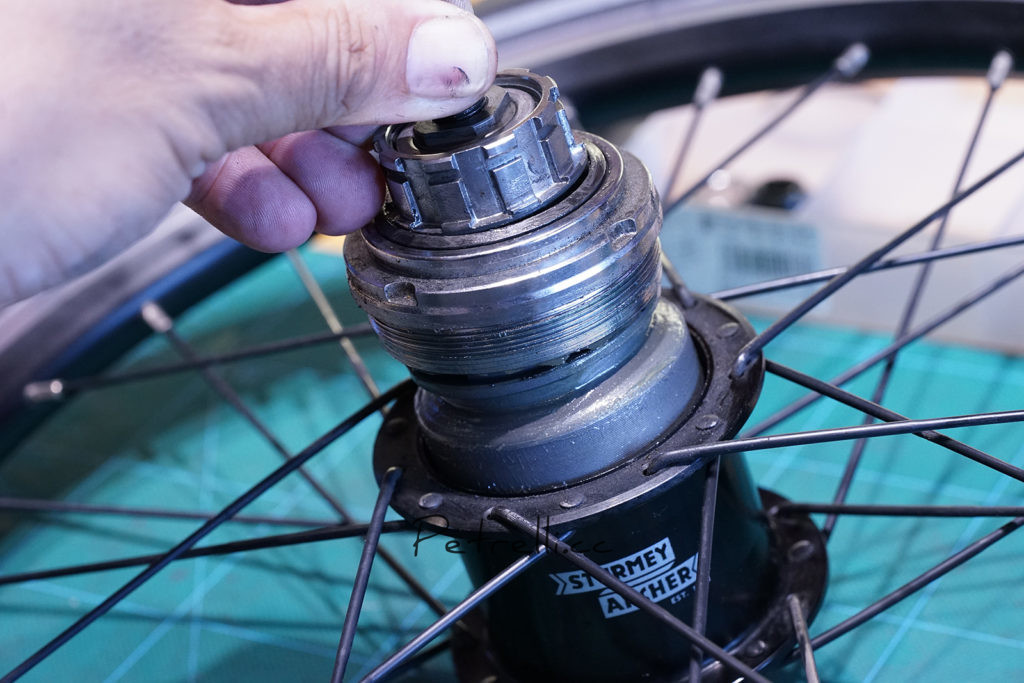
The entire “gear box” can easier be pulled out from the hub’s casing.
![](http://www.petrelli.cc/wp-content/uploads/2018/06/cracking_the_rear_hub_open_010-1024x683.jpg)
This “gear box” condition isn’t that bad.
![](http://www.petrelli.cc/wp-content/uploads/2018/06/cracking_the_rear_hub_open_011-1024x683.jpg)
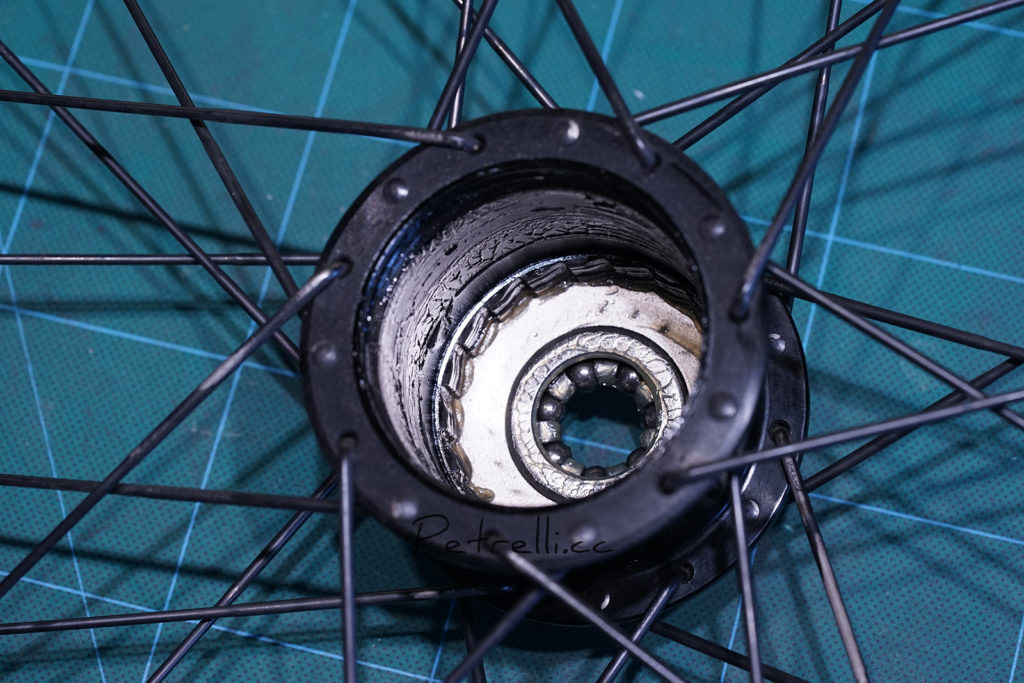
The internal view of the rear hub’s casing.
![](http://www.petrelli.cc/wp-content/uploads/2018/06/cracking_the_rear_hub_open_012-1024x683.jpg)
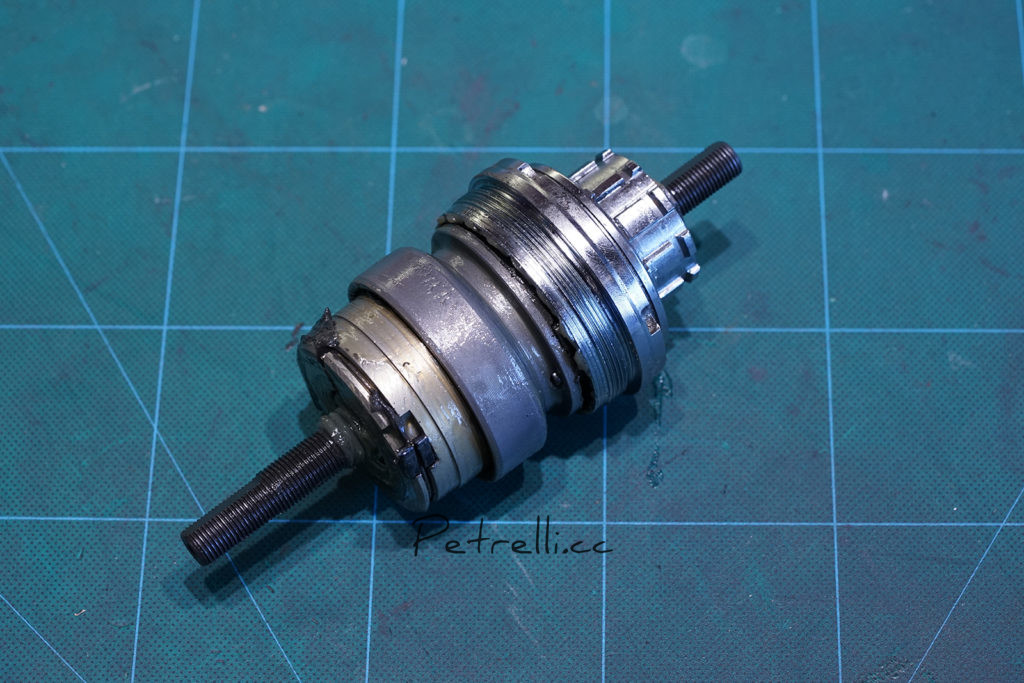
Prepare to stripe apart the “gear box” into bits and pieces.
![](http://www.petrelli.cc/wp-content/uploads/2018/06/cracking_the_rear_hub_open_015-1024x683.jpg)
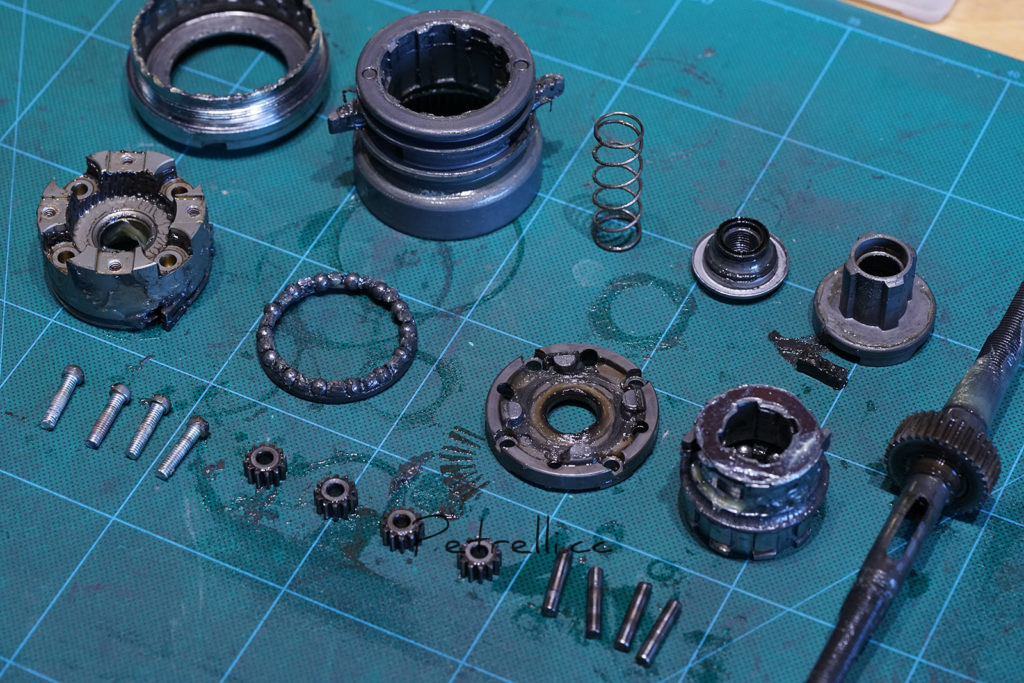
Slowly de-grease, service and check to the condition of each of the small parts.
![](http://www.petrelli.cc/wp-content/uploads/2018/06/cracking_the_rear_hub_open_017-1024x660.jpg)
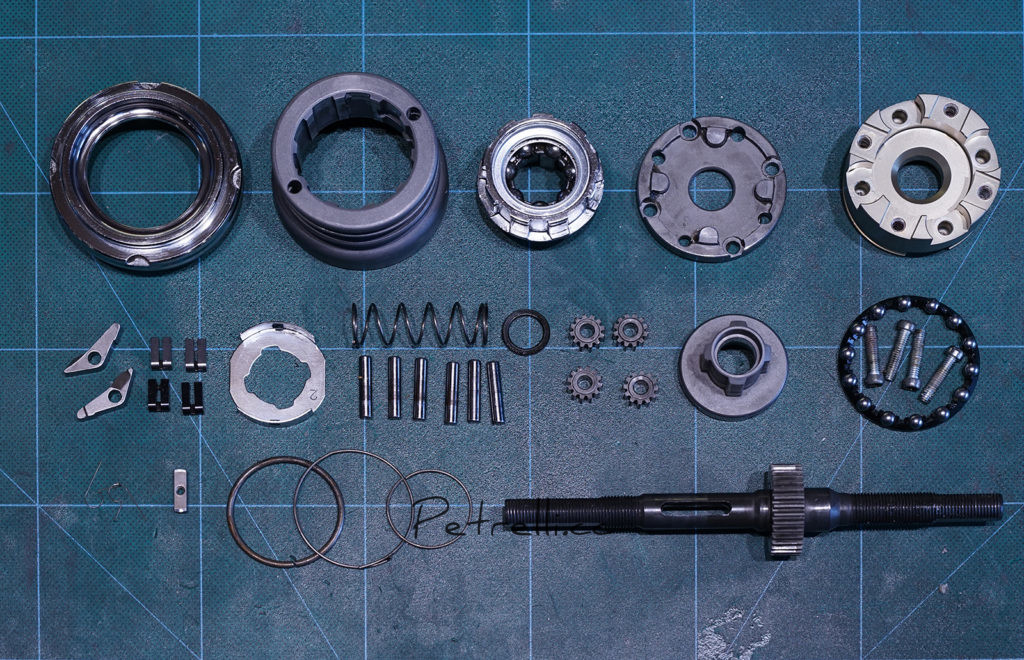
Extra care were taken to handle the smaller parts such as the retention springs.
![](http://www.petrelli.cc/wp-content/uploads/2018/06/cracking_the_rear_hub_open_018-1024x683.jpg)
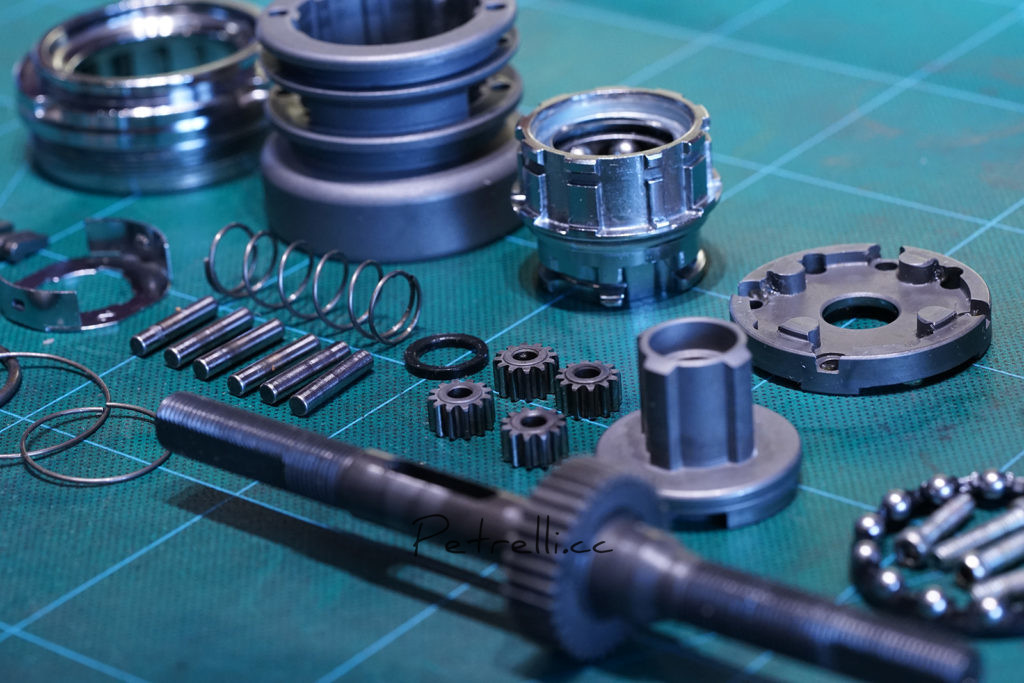
Nicely serviced and ready for the re-assembled.
![](http://www.petrelli.cc/wp-content/uploads/2018/06/cracking_the_rear_hub_open_019-1024x683.jpg)
All done and ready for actions.
There will be a follow up post more on the “gear box” section of the hub.